Varieties of manicure tables, DIY
The success of the nail service master depends on two important factors: the professionalism of the person and the functionality of the workplace. The first is achieved through many years of experience. The second can be provided without large costs. To build a manicure table with your own hands, you need to clarify the features of such products, create a drawing, choose the right tools and materials. For beginners, special instructions and master classes with an accurate description of the stages of work will come in handy.
Design features
A manicure table resembles an ordinary, but complemented by numerous shelves and drawers. The product is designed specifically for the convenience of the master and client. Modern models differ:
- dimensions;
- configuration;
- complete set;
- the presence of additional features.
When creating the design, it is taken into account that two people will use them at the same time, while they should not touch each other with their knees.
On the surface of the product should be placed all the necessary professional equipment for work:
- disposable files, scissors, nippers, brushes, napkins;
- bright table lamp;
- apparatus for manicure;
- UV lamp for drying gels and gel polishes;
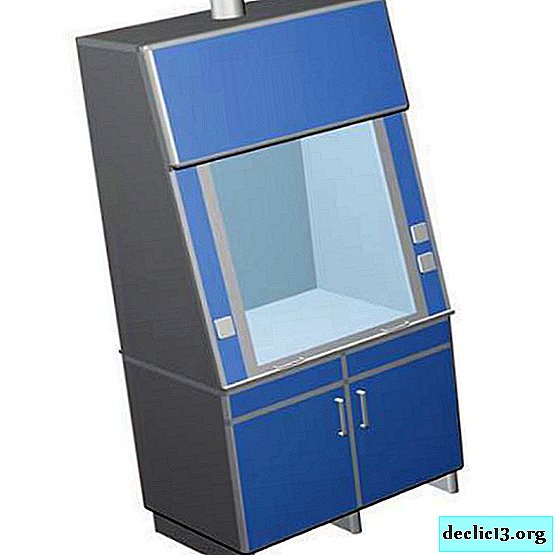
- extractor hood.
A standard table for manicure consists of a durable comfortable tabletop, bedside tables with drawers for storing things that support the legs. Furniture can have a standard or unusual shape, one or two seats for customers. There are ordinary and folding designs. Additionally, products can be equipped with built-in hoods.
Specialized furniture is used in beauty salons and at home.


Varieties
Tables for manicure can be of various configurations:
- Standard direct products are the most simple, practical, compact. The main disadvantages - using such furniture is not always convenient.
- T-shaped models are equipped with a large number of built-in compartments, but take up a lot of space.
- Corner options save space in the room.
- Furniture with bends and curvatures has an original appearance, allows the master and the client to settle down withconvenience.
The optimal form is selected depending on the habits of a specialist. But experienced craftsmen usually prefer T-shaped products with a slight bend.
The parameters of manicure tables vary depending on the appearance, design, individual preferences of the master. Most popular models:
- Stationary tables. Products are usually used in specialized salons. Their advantages: they are equipped with auxiliary equipment: hoods, lighting devices, tool shelves. Some models are complemented by wheels for ease of movement.
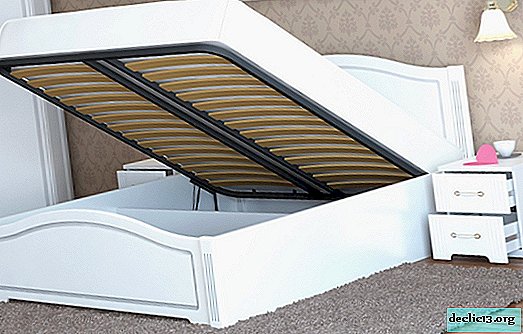
- A folding table is suitable for installation in a small room, this is its plus. The product does not clutter up the space, is performed in various configurations, designs, complemented by an automatic or manual mechanism.
- Racks for express manicure are common in nail bars, where it is important to quickly serve customers. The set includes chairs for workers and customers, lockers.
- A convenient transforming table is transformed into a small bedside table. It is in demand among craftsmen who work at home. Pros: ease of operation, equipped with wheels and shelves.
Products with hanging drawers allow you to place a large number of accessories and care products. Hood tables help keep the workplace clean. Indeed, as a result of removing the old coating from the nails with the apparatus, dust will inevitably form, which will be absorbed by a special vacuum cleaner.
 Standard
 Angular
 Folding
 Express manicure stand
 Table transformer
Drawing drawing
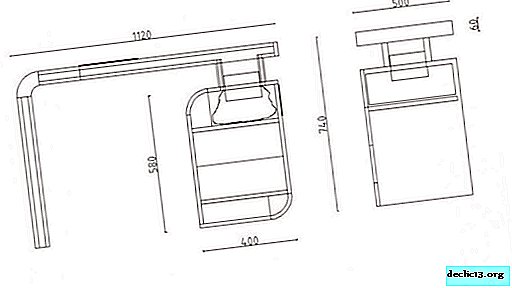
To start work on the manufacture of furniture is to clarify the size of the manicure table. The optimal length is 1.15 m, the width of the canvas is 45-50 cm, the height is 75 cm. These are the parameters that make the master and client feel comfortable. Classical figures may change if an unusual design is used. At the same time, it is important to observe the main rule - ease of use.
At the initial stage, drawings with dimensions are created that simplify the process of assembling the table and avoid many errors. The scheme is made using ready-made master classes, computer programs for furniture makers or independently:
- A sketch of the proposed design is applied to the paper.
- Each element of the table is marked.
- The connection points of the parts used fasteners are indicated.
- The optimum parameters of all parts are recorded.
- Suitable material is determined.
Tables can have a standard shape, include a small cabinet for storing accessories. Folding or folding tabletops are complemented by shelving, coasters and shelves. Properly made drawings do not only consist of the required dimensions, the location of the holes for the embedded equipment must be indicated.


Materials and Tools
To make a table with your own hands, you need to choose the right material. Modern manufacturers use:
- massif of wood;
- MDF;
- steel;
- Chipboard;
- laminated canvas;
- glass;
- plexiglass.
Most often, combinations of different options are used.
Creating tabletops for do-it-yourself manicure tables is possible from MDF, wood, chipboard. They must be strong enough so that various chemicals cannot damage them. Suitable material that is easy to clean, does not require complicated care. For salons and home use, optimal laminated surfaces, plastic, glass.
The list of necessary tools for work includes:
- screwdriver;
- measuring tape or tape measure;
- metal ruler;
- pencil for marking parts;
- electric jigsaw;
- screwdriver;
- scissors;
- iron;
- hex keys.
To make a manicure table with your own hands, you will need PVC edges, high-quality fittings, carpentry glue. Confirmats, self-tapping screws, eccentrics and rods for them are used as fasteners.
 MDF
MDF Steel
Steel Chipboard
 Laminated canvas
 Glass
Glass Array and Plexiglass
Model Instructions for Manufacture
Beginners and experienced furniture makers are guided by suitable instructions. Do-it-yourself master classes on creating manicure tables will help you to accurately follow the process, reduce the risk of defects.
Classic rectangular
Step-by-step instructions for making a classic rectangular table:
- Details of a traditional product are cut out. This takes into account certain sizes of the manicure table. In this case, the tabletop parameters are 95 x 48 cm, the back wall of the bedside table is 75 x 30 cm, the side canvases are 75 x 46 cm, the bottom is 46 x 30 cm. The large shelf has dimensions 45 x 29 cm, the small shelf 45 x 28 cm , door - 40 x 30 cm. The listed characteristics are used when cutting parts.
- The ends are machined with PVC edges.
- Holes for dowels are made in the side walls. From them it is necessary to measure inward at 15 mm to screw the rods.
- In the rear part, 4 armholes are drilled, the surface of which is lubricated with glue, then fasteners are inserted into them.
- Dowels are coated with glue to fix the shelves.
- Legs are purchased ready-made or are made independently from small pieces of wood.
- The countertop is fixed with the help of eccentrics, the holes for drilling holes must strictly correspond to the sides of the cabinet, therefore, marking with a pencil must be done in advance.
To make a table for manicure with your own hands, you need to attach the countertop to the pedestal. Shelf holders are inserted into the holes, then shelves are installed on them. The model can be painted or decorated at your own discretion.
 Countertop drawing
 Whole table drawing
 Cut the countertop, fasten it on one side with a wall, attach a leg on the other
 Assemble drawer and shelves
 Attach a shelf to the wall, make hooks
 Cover the table with yacht varnish
 Result
Compact folding
Detailed instructions will help you figure out how to make a manicure table yourself. To work, you will need:
- Chipboard 16 mm;
- PVC edges for end processing;
- fittings;
- guides;
- dowels;
- furniture glue;
- self-tapping screws.
In this embodiment, the surface of the countertop is 95 x 48 cm, the total height of the structure is 75 cm. The algorithm of actions:
- All elements are cut out of the prepared material using an electric jigsaw.
- First of all, a stand is made. Holes are drilled in the side panels and ends for the installation of confirmations. It is necessary to act strictly in accordance with the drawing, so as not to make a mistake with the location of the holes.
- The cupboard is assembled by Euroscrews and hexagons.
- All sections are processed with a jigsaw, polished with sandpaper.
A folding table implies the installation of special fittings. For finishing, you can use varnish or paint. Their use will make the furniture more attractive, as well as extend its life.
 Drawing
 Saw the chipboard details: countertop, rear wall of the cabinet, side walls of the cabinet, bottom, large shelf, small shelf, cabinet door
 The ends of all parts must be glued with a PVC edge
 Make holes for dowels in the side walls of the cabinet. Fasten the cabinet and the large shelf.
 Drill 4 holes in the rear wall, grease with glue and insert dowels. Drill holes in the upper large shelf
  Lubricate dowels with glue and fasten the wall with eccentrics to the large shelf
  Make holes for the loops, slightly backing away from the edge. Attach a hinge to the door
 Turn the cabinet over and grease the dowels with glue. Close the top with the bottom. Secure with screws
 Attach a leg to the countertop, slightly departing from the edge
 Attach the countertop to the pedestal
 Result
With hood
Many masters think about how to make a nail service table with a hood. In this embodiment, the parameters of the lower panel are 46 x 30 cm, the doors are 40 x 30 cm, the rear wall of the cabinet is 75 x 30 cm, the side panels are 75 x 46 cm. The dimensions of the small shelf are 45 x 28 cm, the large - 45 x 29 cm .
The width of the table for manicure will be 95 x 48 cm. Step-by-step master class:
- Cut out countertops and other elements along the edge are glued with an edge.
- To assemble the cabinet, you need to connect the parts using fasteners.
- Shelves are fixed on dowels, then legs are made.
To make a hood for a manicure table with your own hands, you will need an electric motor with blades with a power of no more than 60 watts. A power supply with an appropriate voltage is selected. Reliable methods of drawing in air and removing moisture are used. The portable version can be made of plastic, easy to handle and transport. A special dust collector is provided for removing garbage.
Self-made manicure tables can be a worthy alternative to purchased products. Standard, folding, models with built-in hoods are optimal for use in salons and at home. The application of master classes will help even beginners to master a new business.
 So that the dust bag does not spoil the look of the manicure table, you can equip the countertop with a small dust box
 Manicure table with hood
Video
Watch the video: DIY Vented Manicure Table (December 2024).


-
A riot of colors and aroma: English roses, all about them
Austin roses are the most beautiful flowers among all kinds of roses. They were bred artificially by crossing several types of ornamental plants. The result was a flower of incredible beauty that impresses with its appearance and falls in love with itself at first sight. They are distinguished by a riot of colors, but rather capricious to weather conditions, as they react poorly to strong winds, rain and low temperatures. ... -
-

-